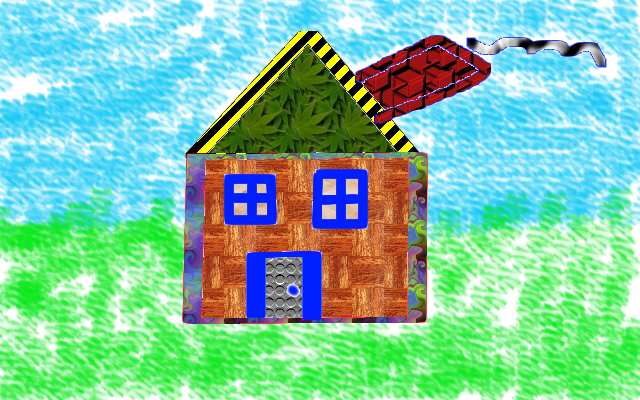
- Go to Cricut.com/design and sign up for a new account.
- Watch the video below and follow the steps. I want you to make this project.
- If there is another design you would like to make instead, that is fine...just make sure it is school appropriate.
- I do not have any tumblers, but you can put your design on a notebook or on your wall at home.
|
0 Comments
Download InkScape
|
|||||||||||||||||||||||||||||||||||||||||||||||||||||||||||||||||||||||||||||||||||||||||||||||||||||||
| Gimp 11: Face Swap *Choose (Matthew or Katy) for face swap.
| Assignment: 1. Upload your final image (face swap)...Iron Man with Matthew or Katy. 2. Find two images and download. Create a face swap using these photos. Be creative! Look at these pics for examples: Pic 1, Pic 2, Pic 3 3. Upload the original images and the final face swapped image. 4. Blog your comments. | ||||||
| Gimp 12: Cleaning Up Faces *Heal *Clone *Smudge *Blur *Sharpen
| Assignment: Use the image to the left and perform the steps in the tutorial. Use the Heal, Clone, Smudge, Blur and Sharpen tools. Post final image to your website and include your comments. | ||
| Gimp 13: User Interface | **Watch the video and set up your GIMP Interface as described. There will not be an image to be graded on this video tutorial. |
| Gimp 14: Threshold, Aliasing and Curves | Assignment: 1. Locate, download, save and edit a photo of a beach scene. Edit using Threshold, Aliasing and Curves. 2. Define Aliasing and Anti-Aliasing (know the difference between the two and why you would use Anti-Aliasing). 3. Define Threshold in graphic design. (What does THRESHOLD do?) 4. What does the "curves" plug-in do in GIMP? See this site for information: CURVES |
| Gimp 15: Changing Background Color (Color to Alpha) | Assignment: You will follow the tutorial and create an image with background and text. Export that image, then go through the "Alpha to Color" steps and change the background. When finished, export the final image. For this assignment, you will upload two images (before and after). |
| Gimp 16: Sketch Effect | Assignment: Locate an image (professional like) with good lighting to use for this assignment. Apply the techniques to create a sketch effect of the photo. You should upload the BEFORE and AFTER photo to your blogs. |
| Gimp 17: Green Screen Removal | Assignment: Think about five places you would like to travel to on vacation... ANYWHERE IN THE UNIVERSE. Locate images online (high resolution) that represent those places. You will then take a few pictures in front of the green screen...pose so that you can fit into the background. Once your five photos are edited and exported as JPG images, you will create five postcards using PowerPoint. I will give you instructions later regarding this part of the assignment. **Make sure you update your blog online with your five completed images. |
| Gimp 18: Custom Brushes | Assignment: Work on Gimp with creating brushes. I want you to make one brush, export and save as a "gih" file. Export your BRUSH image as a jpg and update your blog. Update your blog with the image you used to practice using the newly created brush. Also, describe the brush you made. |
| Gimp 19: Water Reflection
HINT: When the teacher tells you to fill the selected area with black...make sure (Under Paint Bucket tools options) that the "Fill Whole Selection" is chosen...not the "fill similar colors" option. | Assignment: 1. Work through this tutorial using the White House image to the left. 2. Find another image and add a water reflection to it. 3. Upload both final images to your blogs. | ||
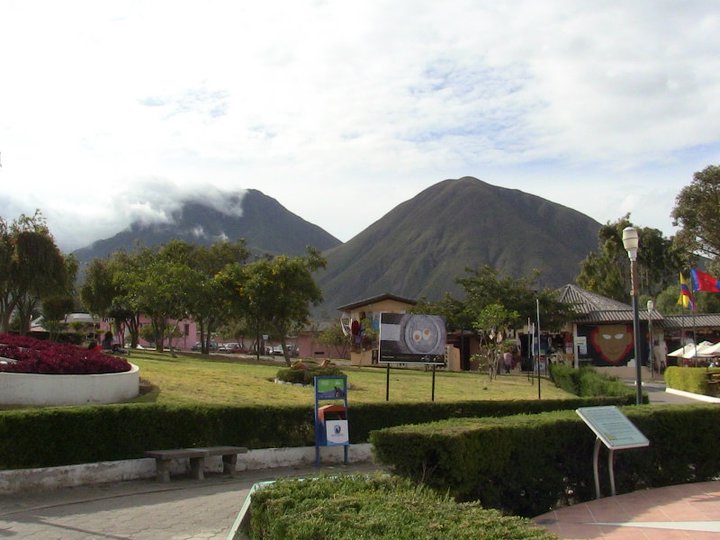
| Gimp 20: HDR Photo Correction
| What is HDR Photo Correction: Watch this video on HDR (High Dynamic Range) photography. Notice the difference between each set of pictures. HDR Defined: HDR techniques allow you to take pictures of high-contrast scenes and preserve all that important shadow and highlight detail. Most cellphones come with an HDR setting when you are taking photos. Assignment: Using the photo on the left, make color correction to the mountain area on the photo. Post final exported image to your blogs. | ||
Watch each tutorial below. Tutorials 1-3 will introduce you to Gimp's basic setup and tools. WATCH THEM FIRST. I want you to open Gimp and begin practicing how to use the program. Follow instructions in the tutorials.
| Gimp 01: Introduction | |
before you go any further, log into your website on weebly and add a new "blog page". You will add all of your finished images to this blog in order for me to grade. **see me if you forgot your login information.
1. Create a new blog page and name it "Digital Image Design"
2. For each tutorial that has an assignment attached you must create a new blog entry...not a new blog page. Give it an appropriate name and upload the photo into your blog entry.
3. Describe the photo and what "specifically" you did to the photo.
| Gimp 02: Saving & Exporting Images | |
| Gimp 03: Scale, Rotate, Crop & Flip | Assignment:
| ||
| Gimp 04: Designing a Logo | |
| Assignment: Create a logo using your name or nickname (make sure it is school appropriate). Upload the exported (final) image to your blog page. Add a description to what you did to create the image. |
| Gimp 05: Selection Tools & Drawing Shapes | Assignment: Create a new image and add at least three shapes (using the selection tools) and color each design. Export as a jpg and update your blog with a written description. |
| Gimp 06: Paths Tools | Assignment: Create a new image and add some shapes with curved lines. Add color, export as jpg image and update your blog with the image and description. |
| Gimp 07: Creating a Vignette
| Assignment: Choose an image from online, a current photo from your phone, or use the IPad and take a photo. Use this photo and create a vignette. Look into the different filters. You do not have to choose the same filter that I chose. **Important: Upload BOTH the puppy vignette AND your chosen vignette to your website blog. Make sure you comment on the procedures...Indicate which filters you used. | ||
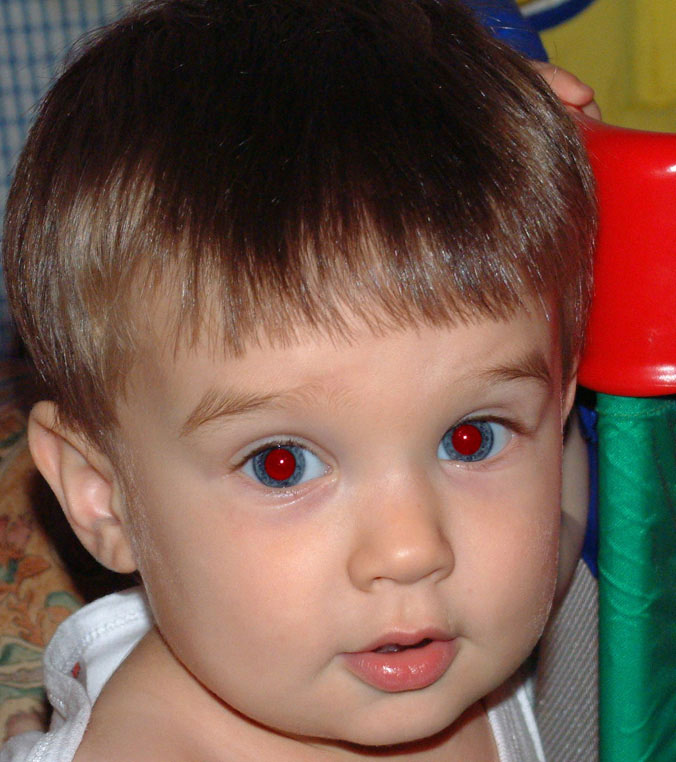
| Gimp 08: Removing Red Eye
| | ||
| Gimp 09: Drawing Straight Lines & Filling with Patterns | Assignment: Use Gimp and the paintbrush or pencil tools and create a drawing (anything school appropriate). Make sure you add some straight lines and add color using solid colors AND Patterns. Export as a jpg image and add to your blog with commentary.
|
| Gimp 10: Layer Masking
| Assignment: Locate and download a full-sized color photo and create a layer mask. Make the color shine through in certain spots. I need to see that you changed the photo significantly. Then, upload your original image AND your final image. Don't forget to comment on the procedures used. To watch a video on how to locate images in Google that you can use and modify, Watch below. | ||
She talks really fast, but it has a lot of good information in the video.
| Worksheet 1: |
| |||
| Worksheet 2: |
| |||
Canva Tutorials
| 1. Continue working through the 30 tutorials on Canva.com. Tutorials 1-30: https://designschool.canva.com/tutorials/ 2. You will see the presentations to the right. Look through those. I have covered Workshops 1-3 in class, look over at least Workshop 4 today. |
| ||||||||
| 1. Before you begin, make sure you have finished the Audacity project (Animal Poem) and you have submitted the MP3 file. DUE TODAY!!! 2. The "Smell Be Gone" project will be due on Monday. Gather (download) your files first then import into Audacity to begin editing. DO NOT use YouTube for any instrumental files...Only FreePlayMusic.com. 3. Download Audio file to the right of these instructions. Create a new folder called "Smell Be Gone". Make sure it is located under your "My Documents" folder and not under the music folder. Make sure all audio files are saved in the same folder. 4. Open the document to the right to see the instructions and rubric for grading. 5. Remember this project is due on Monday! | Click HERE to download MP3 File above. *Required file for commercial... **You will have to edit the narration, so listen closely for mistakes...coughing, etc.
| ||
| You will learn how to use an Audio editing program called Audacity. Before working with Audacity... It is important for you to create a project folder under your username and keep all related files together. Instructions for project: 1. Under your username, create a folder and name it "Jungle Theme Project" 2. Download the three files to the right and save them in your Jungle Theme Project folder 3. I will walk you through how to use Audacity and we will create the project today during class. Once you are done with your project, finish the PowerPoint recording that you had problems with last week. | Files Available for Download
| ||||||
You will create an account with Podomatic, upload your audio file and share your podcast URL.
1. Make sure you have downloaded your audio file you created before Christmas break. Go to Edmodo (Digital Design 2nd Qtr) and go to your progress page. Find the posting for your audio file and download if necessary.
2. Watch the tutorial below.
3. Create an account with Podomatic and create your first podcast entry.
4. Share the URL (website address) of your ACTUAL podcast page/site within Edmodo.
5. Remember your login information. You will use Podomatic again during this class.
Password Security PowerPoint
Once you are done with the above steps and have submitted your URL to Edmodo, I want you to open up your password security PowerPoint you created. You will write a script (in the notes section). You will teach each slide in your presentation.
1. Open PowerPoint (Password Security Presentation) you created.
2. Begin writing a script for each slide. You MUST have text in the notes section for each slide. You will teach the slide to your peers.
3. You will then begin recording/narrating each slide within PowerPoint.
1. Open PowerPoint (Password Security Presentation) you created.
2. Begin writing a script for each slide. You MUST have text in the notes section for each slide. You will teach the slide to your peers.
3. You will then begin recording/narrating each slide within PowerPoint.
Creating secure passwords: Do you think it is difficult to create a secure password AND remember it...for each site? Well, I'm here to tell you that you CAN with just a few easy steps!
Click on the video below to watch my presentation on Secure Password Guidelines. This presentation will provide you with good and bad examples of passwords as well as teach you how to create a secure password.
You will then follow the instructions below (and my PowerPoint example) to create your own instructional presentation on how to keep your passwords secure.
Assignment:
Create a PowerPoint (at least 5 slides)...must include the following information:
1. Title Slide (title and your name)
2. Good and Bad examples of passwords
3. Tips on how to create a secure password
4. Method...step-by-step of you creating a secure password. (see slide 5 of my presentation above) (search the Internet for methods on creating passwords--choose a method and walk me through the steps).
When we get back in January, you will create a script and present (narrate & record) your project.
Cynthia Hendrix
A teacher, a single parent, and a servant of Christ!
Categories
All
Add-on
Audacity
Blog
Color Theory
Creature From The Black Lagoon
Cricut
Editing
EOQA Review
File Types
Gimp
Image Editing
Inkscape
Interview
Narrable
Passwords
Podcast
Podomatic
Rastor
Rubric
Screencast
Security
Shots
Storyboard
Tutorial
Vector
Video
Weebly
Archives
April 2015
March 2015
February 2015
January 2015
December 2014
November 2014
October 2014
September 2014
August 2014
 RSS Feed
.jpeg)