Tutorials 1-10 Due Thursday, April 19
introduction:
Watch each tutorial below. Tutorials 1-3 will introduce you to Gimp's basic setup and tools. WATCH THEM FIRST. I want you to open Gimp and begin practicing how to use the program. Follow instructions in the tutorials.
| Gimp 01: Introduction | |
| Gimp 02: Saving & Exporting Files | |
before you go any further, log into your website on weebly and make sure you have a gimp page. You will add all of your finished images to this page in order for me to grade. Make it look professional.
**Look on Edmodo, Under Weebly Websites group for log in information.
1. For each tutorial that has an assignment attached you must add your final images to your GIMP page. *some assignments will have more than one image to complete.
2. You must include the tutorial title (as a label/heading).
3. Describe the photo and what "specifically" you did to the photo. **Use complete sentences. (At least three (3) sentences)
| Gimp 03: Scale, Rotate, Crop & Flip
| | ||
Assignment:
- Download the photo above (Princess Photo) and practice: Scale, crop, rotate, flip. **Remember your Rule of Thirds when cropping.
- Post to your website on the GIMP Page.
- Describe the procedures for what you did to your picture. *Use complete sentences.
| Gimp 04: Designing a Logo | |
Assignment: Create a logo for FHS or a favorite team. You can use the logo you created earlier in class. Use appropriate colors that will represent the team. Upload the exported (final) image to your web page. Add a description to what you did to create the logo in GIMP
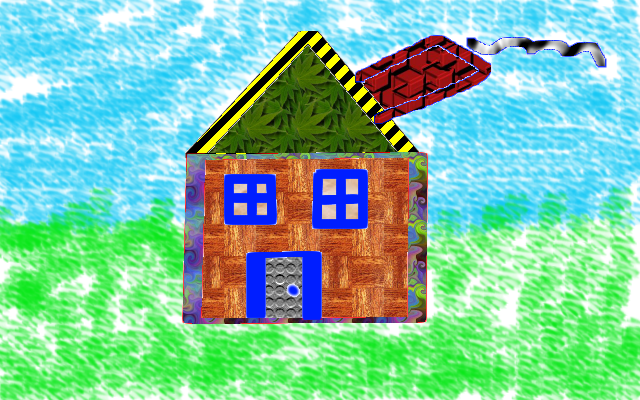
| Gimp 05: Selecting Tools and Drawing Shapes | Assignment: Create a new image and draw a house (using the selection tools) and color each design. Export as a jpg and update your webpage with a written description and a label. |
| Gimp 06: Paths Tool | Assignment: Create a new image and add some shapes with curved lines. Add color, export as jpg image and update your webpage with the image and description and label/heading. |
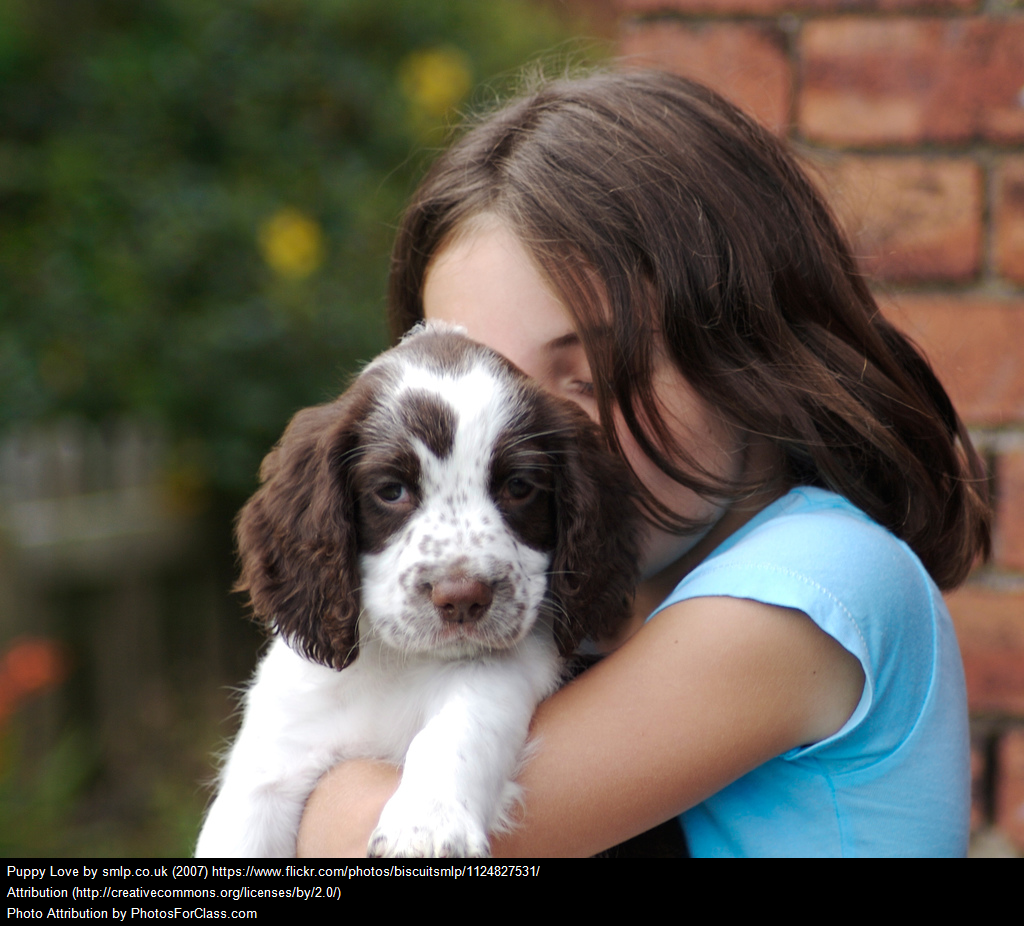
| Gimp 07: Creating a Vignette Use this image below to create the vignette. Then complete the assignment listed below the video.
| Assignment: Choose an image from online, a current photo from your phone, or use the IPad and take a photo. Use this photo and create a vignette. Look into the different filters. You do not have to choose the same filter that I chose. **Important: Upload BOTH the Puppy Love vignette AND your chosen vignette to your website. Make sure you comment on the procedures...Indicate which filters you used. | ||
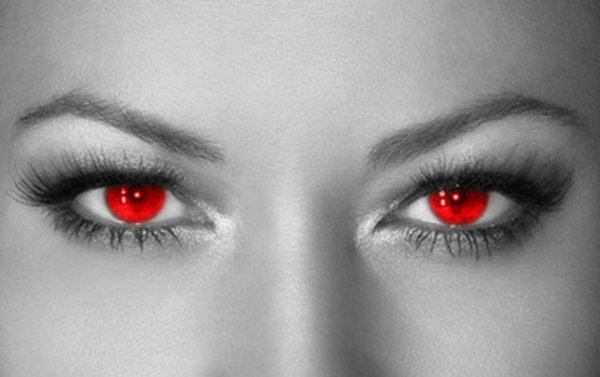
| Gimp 08: Removing Red Eye
| Assignment: Use the photo file "Red Eyes by Solsun" to complete this project. Then upload to your website. Don't forget to add a label and write the instructions on the steps you took to correct the red eye. | ||
| Gimp 09: Drawing Straight Lines & Filling with Patterns | Assignment: Use Gimp and the paintbrush or pencil tools and create a drawing (anything school appropriate). Make sure you add some straight lines and add color using solid colors AND Patterns. Export as a jpg image and add to your blog with commentary.
|
| Gimp 10: Layer Masking
| Assignment: 1. Complete the tutorial above with your choice of image (on the left). Upload to your website. 2. Locate and download a full-sized color photo (High Resolution from Pexels.com) and create a layer mask. Make the color shine through in certain spots. I need to see that you changed the photo significantly. 3. Upload your original image AND your final image. Don't forget to comment on the procedures used. **If video doesn't load, here is the link to view via Google Drive: Layer Masking | ||||
 RSS Feed